Thursday, September 18, 2014

Homemade Headset Removal Tool

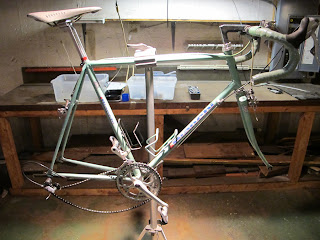
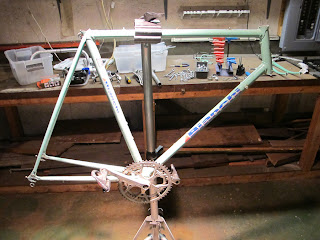
I'm a big fan of making custom tools that solve problems that stall a project.  For this build, I have a Japanese built 25" frame made by Lotus.  The head tube is about as long as they come...which makes getting the head set cups out a real challenge.  Usually, I use a long flat head screwdriver to reach down into the head tube and catch the lip of the cups.  Then I tap it out with a rubber mallet.  But this time, the screwdriver couldn't reach!

Basically what I created is a specialized chisel using a 1"tube with one end cut into quarters about 4" down and splayed open slightly.  I made sure my tube was longer than the head tube.  

When the non-cut end is inserted the splayed end gets squeezed into the tube and after it passes the cups, it springs out over the lip evenly with a satisfying snap.

All that's left is to tap it out with my rubber mallet.  Voila!

Monday, July 15, 2013

Blue Schwinn Varsity


Back to Schwinns again!  This classic Varsity was a typical restore and tune up.


This bike was definitely upgraded from it's original components.  That's a nice Shimano derailleur set!  Plus a chrome fork and quick release wheels.


New chain, tires, bar wrap, cables, and housing.  This bike is hotter than summer.
Happy Riding Kevin!

Tuesday, April 9, 2013

Follow the Yellow Tricked Road Bike


Alright!  It's done.  Finished the matching bar wrap and tightened everything up just last week and dropped it off to Andy A. in Chicago.  This was a fun restore and conversion project on a beautiful Bianchi frame.  I thought the gold accents would look good but it really exceeded my expectations and makes a striking compliment to the Celeste green.

The bike is running a 46t/17t gear ratio and those are Velocity Deep Vs 700/23 size wheels.
Happy Training Andy!

Friday, February 8, 2013

Bianchi Single Speed Rebuild

Welcome back to Shin Schwinn!  It's been a while because we've moved! The ShSch shop is now located in Batavia, Il!  I'm still working on getting the shop set up just right but for now it's at least up and running!

The first job in the new shop: An 80's Bianchi road bike in their signature Celeste Green color.
This is a restore and rebuild project for my friend Andy A. who is looking to make this a winter single speed.

This bike was obviously well used and is in serious need of a tune up.
Let's strip it naked!

This is the head set laid out.  The bearings are completely seized.


The rear derailleur is totally shot.  Several teeth are broken from the cogs but it's a good thing we're turning this into a single speed so we won't need to worry about this part.

Cleaned Bottom Bracket

Tip#4 When installing cable housings, use a fine tipped applicator and add a few drops of lubricant into the opening.  Preferably the end that the cable will enter through.  This will help keep the cable nice and slick improving performance and longevity.

Hoses are secured down and ready for bar wrapping.

Tip #5 Use bungee cords to secure the fork in place while you work.  This third hand helps when working on the brake levers and cables and prevents the handlebar from crashing into the top tube.


Here's the bike with all the components installed including a new GOLD crank that will match the GOLD Velocity Deep V wheelset that I ordered for this custom build.  There's a lot of Celeste bikes with common color combos but this Gold accent is going to be really unique.

BTW...please excuse my dungeon workshop, the previous owner left a mess in the basement.  But hopefully this summer, we'll get this cleaned up!


Saturday, June 23, 2012

Schwinn Traveler


Here it is, the fully restored bike!


Frame, fenders, and chain guard all in really great shape!


I replaced the existing spring saddle with a classic Schwinn 2 tone seat used on deluxe model Suburbans.


I can't say enough about how much I love the generator light sets.  Rewired and working perfectly.


Coaster brake working strong.


One last parting shot of the blue beauty!
Thanks John E. for bringing this bike to Shin Schwinn for restoration!


Schwinn Traveler - Rebuild


Here is a Schwinn Traveler Single Speed with Coaster Brake that
needed a complete rebuild.  This is the frame with most of the parts disassembled.  It's a nice frame!


All the parts were degreased and washed.  See the Shin Process for details
This is the bottom headset being re-greased.


OK!  This is looking great so far.  Most of it is put back together and awaiting wheels!


These are 26"x 1 3/8" wheels with rear coaster brake.  Wheels are a pain in the butt but to get them clean and shiny, you gotta go at it with wire brushes and soap. 


This is the first time I've worked on a coaster brake.  Pretty neat design.  I took this pic to study the assembly and also to remember how to put the contraption back together.

For the rims, to keep track of where I am, I usually start where the tube valve hole is and scrub every spoke nipple all the way around til I get back to the hole.  This is the toughest part.  


Ah!  Clean and shiny.  Use degreaser for and a finer brass brush to get the tighter spots if needed!


Tuesday, May 15, 2012

Raleigh Olympian Single Speed $250


This is a 80's Raleigh Olympian frame that I tinkered around with for a while before finishing up.  I got the frame from a student leaving Chicago.  She graduated to a newer model Motobecane but this was her single speed ride.  I was able to find the original cranks but that's about it so I kept it single speed.


It's a all around great bike, Chro-Moly tubing, Weinmann center pulls, and Alex 303 Wheelset  I have it at a pretty high ratio too so it is a beast to ride.  The front chainring is 52t and the rear flip flop cog/free wheel is 16t.  Very fast but you have to be strong!